
For AWS on IZO™+ Multi Cloud Connect Direct: configure the Virtual Cloud Connection with your Account ID, the ASN presented toward AWS and a BGP MD5 key you choose, complete the order, retrieve the peer IPs with Get Network Config, then accept the Hosted Connection and create the Virtual Interface in your AWS account. AWS allocates the VLAN on the Hosted Connection, so the Virtual Cloud Connection has no VLAN field.
This page continues the IZO™+ Multi Cloud Connect Direct order for AWS. Configure the Virtual Cloud Connection below, complete the order, retrieve the network configuration, then finish on the AWS side.
Virtual Cloud Connection – AWS
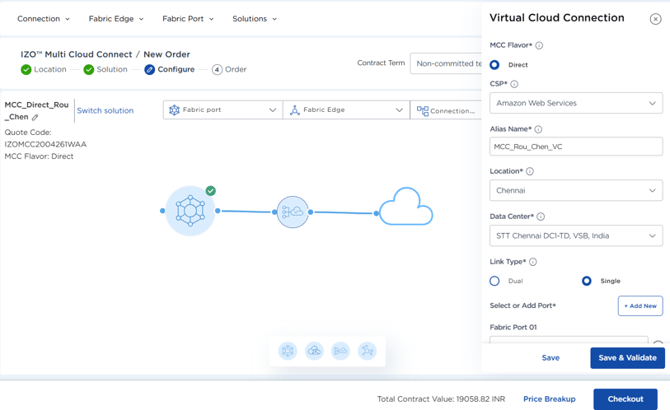
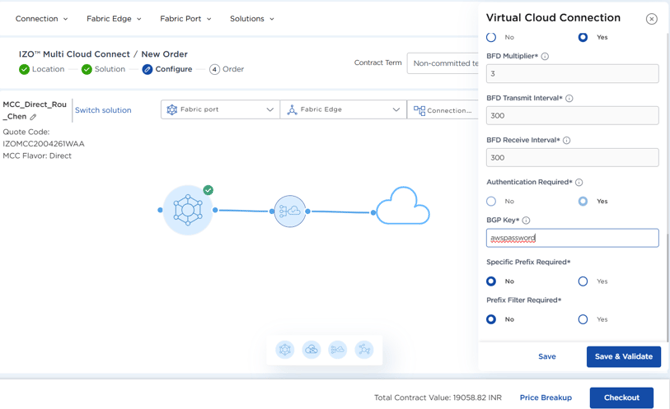
Double click the Virtual Cloud Connection icon and enter the required configuration details. Once completed, click Save and Validate to validate the configuration.
The connection is delivered as an AWS Direct Connect Hosted Connection that you accept in your own AWS account.
|
Field |
Information |
What it is / Demo Value |
Mandatory |
|
MCC Flavor |
Virtual Cloud Connect supports both MCC Flavours:
|
Direct |
Yes |
|
CSP |
Select the Cloud Service Provider (CSP) with which you intend to establish Direct Connectivity. |
Amazon Web Services |
Yes |
|
Alias Name |
Alias Name acts as a unique identifier to link components, enabling easy reference throughout the solution. |
e.g. MCC_Rou_Chen_VC |
Yes |
|
Location |
Select the desired CSP Direct Connect location based on your deployment requirements. |
Chennai |
Yes |
|
Data Center |
Select the data center corresponding to the CSP Direct Connect location where you want to establish connectivity. |
STT Chennai DC1-TD, VSB, India |
Yes |
|
Link Type |
Specifies the connection setup between the VNF and the CSP:
|
Single or Dual |
Yes |
|
Select or Add Port |
The Fabric Port this Virtual Cloud Connection rides on (created in Step 4 on the parent page). |
Your Fabric Port (created in previous step) |
Yes |
|
Bandwidth |
Specify the bandwidth for the Virtual Cloud Connect link between the Fabric Port/VNF and the CSP. |
50 Mbps |
Yes |
|
Redundancy Type |
For dual links, whether this connection is primary or secondary. |
Primary |
Yes |
|
Account ID |
Enter the customer's Cloud Service Provider (CSP) account ID for identification and integration. (Your 12-digit AWS account ID – the Hosted Connection is offered to this account.) |
093432751559 (Use yours) |
Yes |
|
AS Number (Global) |
Enter the AS number of the remote CSP network to establish BGP peering (The ASN presented toward AWS for the BGP session (your public or private ASN)). |
64566 |
Yes |
|
Peer Type |
Select the desired CSP Peer Type:
|
Private |
Yes |
|
Authentication Required / BGP Key |
Set Authentication Required to Yes, then enter the BGP MD5 key that secures the session. |
Choose a BGP key |
Yes |
|
Enable BFD |
Enable Bidirectional Forwarding Detection (BFD) to quickly detect link failures in the BGP session. |
Yes / No |
No |
|
BFD Multiplier |
Set the BFD detection multiplier, which defines how many missed messages indicate a failure. |
3 |
No |
|
BFD Transmit Interval |
Specify the time interval (in milliseconds) between sending BFD packets to the peer. |
300 |
No |
|
BFD Receive Interval |
Specify the minimum time (in milliseconds) the system expects between receiving BFD packets from the peer. |
300 |
No |
|
Aggregate IP Pool Required |
An aggregate route is only active and installed in the routing table when at least one of its contributing, more-specific routes is also active. A contributing route must have a longer prefix length and match the aggregate prefix. Example: 10.10.0.0/16 10.10.1.0/24 10.10.2.0/24 The aggregate route 10.10.0.0/16 will become active if either 10.10.1.0/24 or 10.10.2.0/24 is in the routing table. The aggregate route is then often advertised to other routers, summarizing all the specific routes in one entry. |
If selected Yes, Provide Aggregate IP Pool |
No |
|
Specific Prefix Required |
Option to specify Prefix Exact In / Prefix Exact Out and similar. |
No |
No |
|
Prefix Filter Required |
Option to specify public prefix advertisement from MPLS to cloud and cloud to MPLS. |
No |
No |
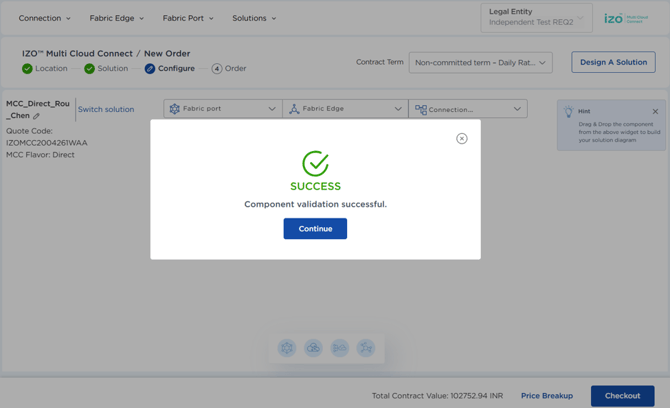
Complete the order
With the Fabric Port and Virtual Cloud Connection validated, set the commercials and place the order.
-
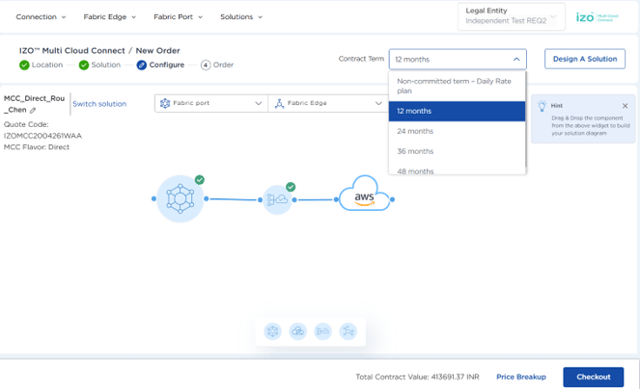
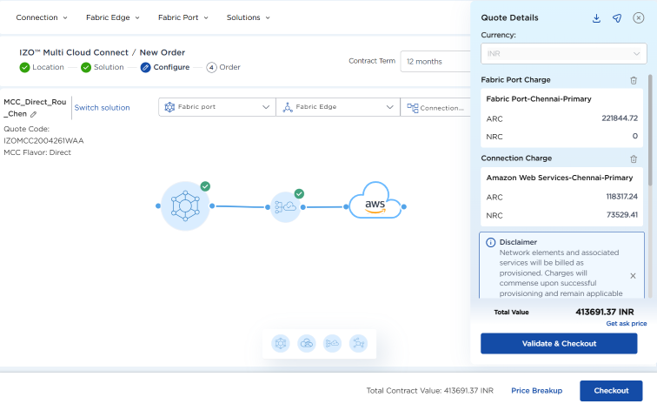
Set the Contract Term. The Total Contract Value (TCV) refreshes automatically; click Price Breakup to see the component-wise charges.
-
On the Price Breakup screen, review the component-wise charges. You can download the draft quote and click Get Ask Price for specific pricing.
-
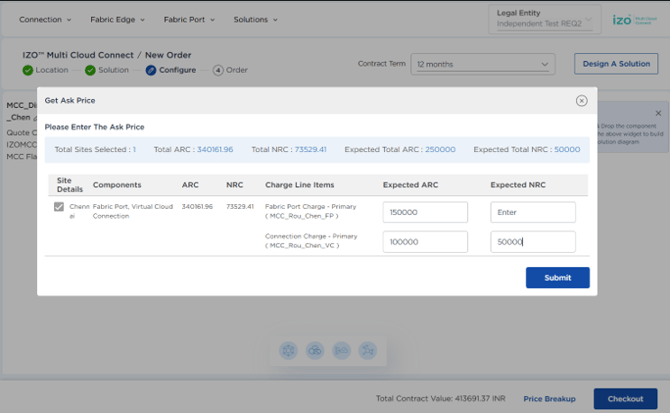
Enter the expected ARC (Annual Recurring Charges) and NRC (Non-Recurring Charges), then Submit. You are notified once final prices are available.
-
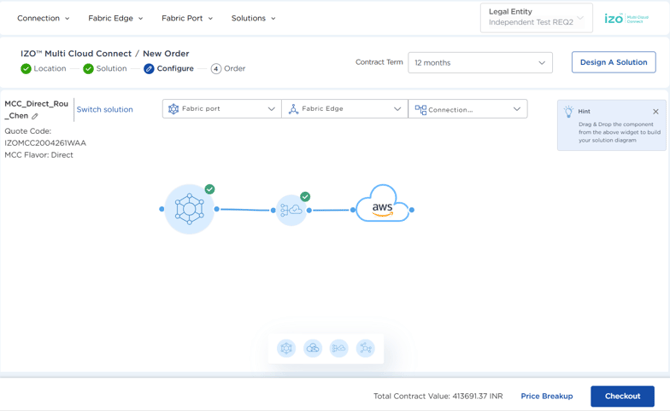
Click Checkout to place the order.
-
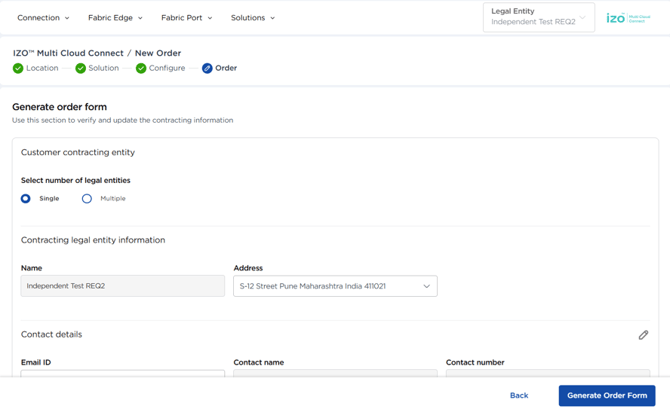
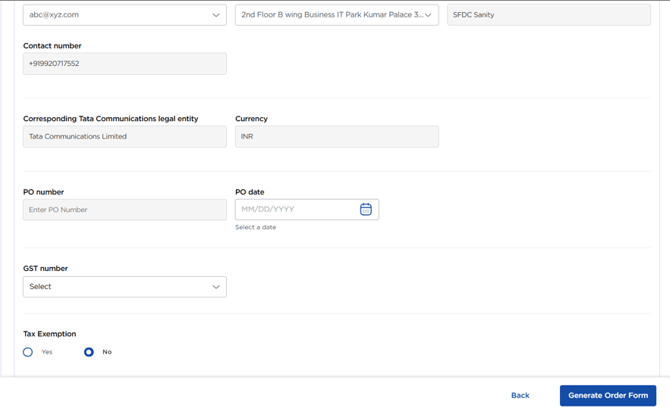
Enter the Customer Contracting Entity details, then click Generate Order Form.
Field
Information
What it is / Demo Value
Mandatory
Select number of legal entities
Whether the service is contracted under a single legal entity or split across multiple.
Single or Multiple
Yes
Name
The contracting legal entity the order is raised under.
your legal entity
Yes
Address
The registered address of the contracting entity.
entity address
Yes
Email ID
Contact email for the order and order-form correspondence.
contact email
Yes
Contact name
The person Tata Communications should contact about the order.
contact name
Yes
Contact number
A phone number for that contact.
contact number
Yes
PO Number
If you have a PO Number from your organisation
No
PO date
Applicable as per previous row
No
GST Number
Dropdown selection if you want to use a GST Number
No
Tax Exemption
Choose if this provisioning is exempted from taxes
No
-
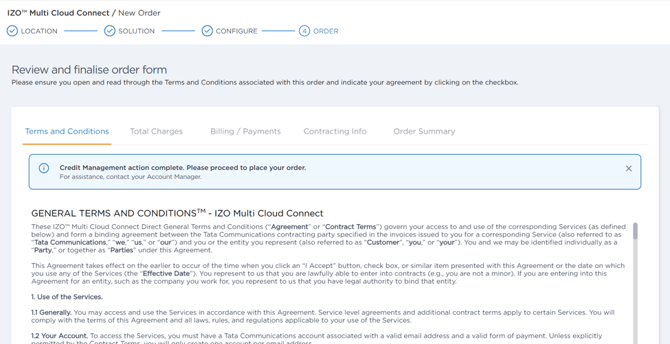
Review the Order Form – Terms and Conditions, Total Charges, Billing and Payments, Contracting Information and Order Summary – and check the agreement box.
-
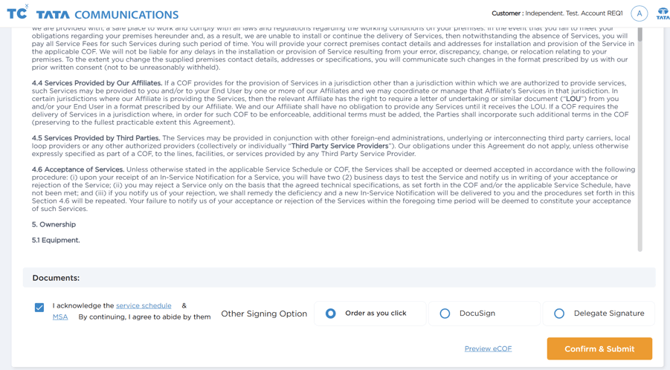
Click Order as You Click to submit directly, or choose DocuSign / Delegate Signature to send the Customer Order Form to another approver to sign.
-
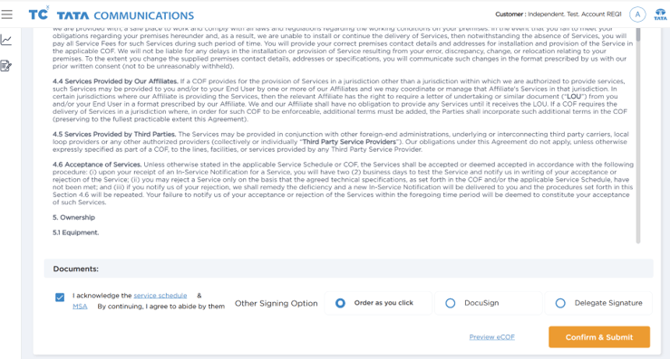
Click Preview eCOF to view or download the draft Customer Order Form. Provisioning begins once the order is signed.
Get Network Config
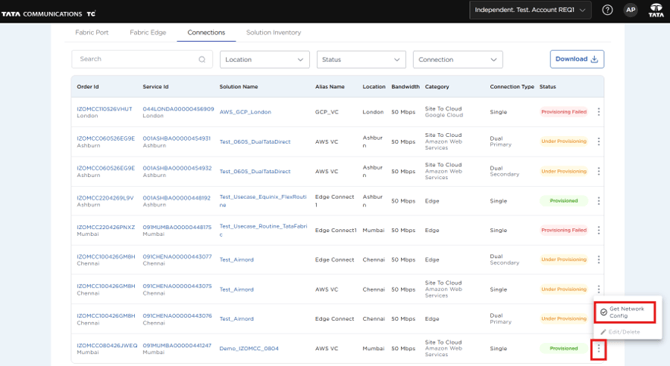
Once the order is provisioned, open Inventory --> IZO™+ Multi Cloud Connect to view the provisioned components – Fabric Port, Fabric Edge, Connections and the full Solution Inventory
-
Open the Connections inventory, select your Virtual Cloud Connection, click the three-dot menu and choose Get Network Config.
-
Note the Cloud IP and Peer IP (each a /30) for the primary and, on dual links, the secondary connection – the addresses Tata Communications has allocated. You enter these when you create the Virtual Interface.
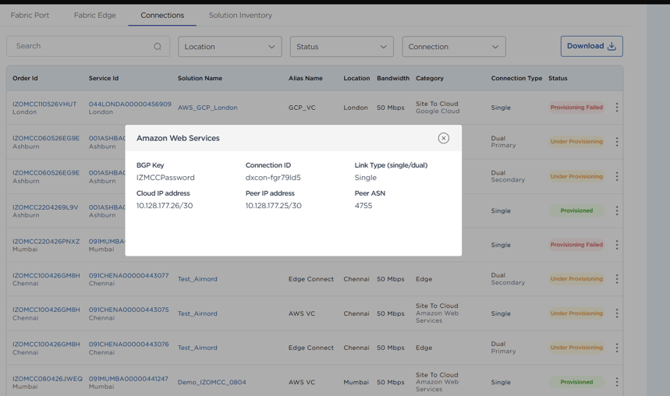
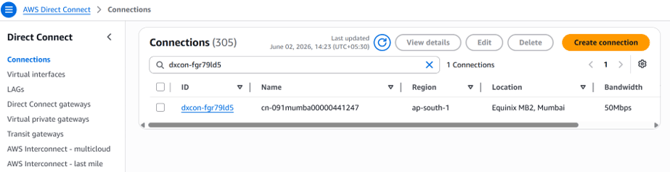
Copy the Connection ID of the Virtual Cloud Connection from the inventory list – you use it to search for and accept the Hosted Connection in the AWS console.
AWS side – accept the connection, create the VIF and bring up BGP
These steps are completed in your AWS Management Console. Have the Connection ID and the Cloud IP / Peer IP from Get Network Config to hand.
1. Accept the Hosted Connection
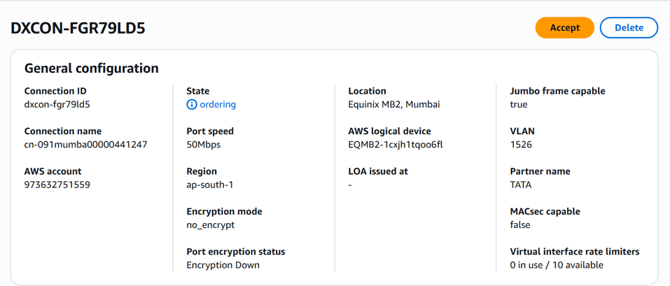
In the AWS console, go to AWS Direct Connect --> Connections, search for your Connection ID, then Accept and Confirm the connection. Its state moves to Available.
2. Create the Virtual Interface
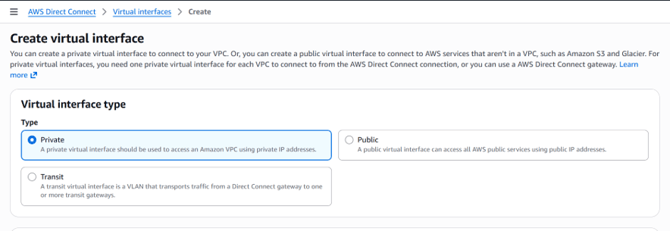
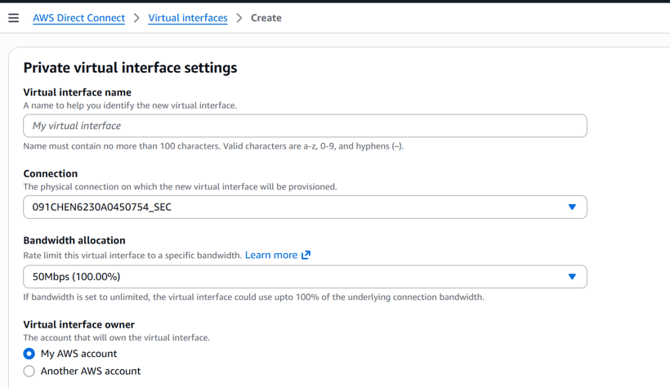
Create a Virtual Interface on the connection and choose the type that matches the Peer Type you set on the Virtual Cloud Connection – Private (VPC), Public (AWS public services) or Transit (Transit Gateway).
3. Set the gateway, VLAN and BGP ASN
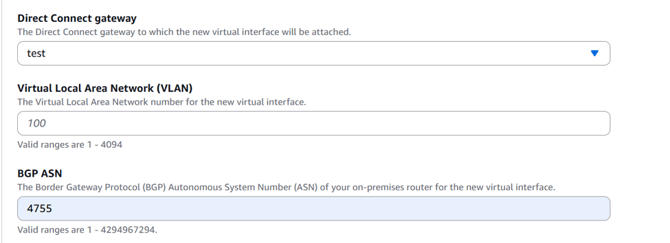
Attach the Direct Connect gateway, set the VLAN, and enter the BGP ASN as 4755 – the Tata Communications ASN shown in your inventory (My Inventory connection).
|
Field |
Information |
What it is / Demo Value |
Mandatory |
|
Direct Connect gateway |
The Direct Connect gateway the new Virtual Interface will be attached to. |
your DX gateway |
Yes |
|
Virtual Local Area Network (VLAN) |
The VLAN number for the new Virtual Interface (valid range 1–4094). |
e.g. 100 |
Yes |
|
BGP ASN |
The BGP ASN of the router on the Tata Communications side, as shown in inventory. |
4755 |
Yes |
4. Enter the peer IPs and BGP key
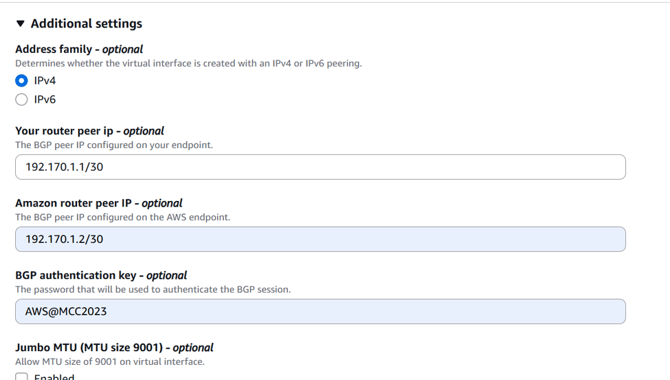
Under Additional settings, enter the addresses from the My Inventory (Get Network Config) section:
-
Amazon router peer IP – the Primary Cloud IP address.
-
Your router peer IP – the Primary Peer IP address.
-
BGP authentication key – the same MD5 key you set on the Virtual Cloud Connection, so both ends match.
|
Field |
Information |
What it is / Demo Value |
Mandatory |
|
Address family |
Whether the Virtual Interface is created with IPv4 or IPv6 peering. |
IPv4 |
Yes |
|
Your router peer ip |
The BGP peer IP configured on your endpoint – the Primary Peer IP from Get Network Config. |
e.g. 192.170.1.1/30 |
Yes |
|
Amazon router peer IP |
The BGP peer IP configured on the AWS endpoint – the Primary Cloud IP from Get Network Config. |
e.g. 192.170.1.2/30 |
Yes |
|
BGP authentication key |
The password used to authenticate the BGP session – the same key set on the Virtual Cloud Connection. |
your BGP key |
Yes |
|
Jumbo MTU (MTU size 9001) |
Optionally allow an MTU of 9001 on the Virtual Interface. |
Enabled / off |
No |
5. Confirm BGP is up
Once the Virtual Interface is created and the session establishes, BGP is up – the end-to-end connection is complete.
For the full AWS-side reference, including VIF options and BGP policy, see AWS Hosted Connection Setup.
Related pages