
This page starts the TCx Portal order for a IZO™+ Multi Cloud Connect Direct connection – a private-MPLS first mile – through product selection, Fabric Port and the Virtual Cloud Connection. At the Virtual Cloud Connection step you continue on your respective cloud service provider page (as the configuration varies cloud to cloud), which completes the order and the cloud-side setup as one continuous flow.
What this is
IZO™+ Multi Cloud Connect Direct delivers your cloud connection over a private MPLS first mile on the Tata Communications network. This page walks the cloud-agnostic part of the order; at the Virtual Cloud Connection step you branch to your target cloud and finish there. If you are ordering the internet-first-mile service instead, see Placing Your IZO™+ Multi Cloud Connect First Flex Order. For the difference between the two, see Service Models Compared. 
Before you start
Complete the Pre-requisites Checklist and Account Setup and IAM, and have the TCx Portal Walkthrough to hand. You will also need the target cloud's account identifier, which you enter at the Virtual Cloud Connection step (for example, your AWS Account ID or an Azure ExpressRoute service key).
Step 1 – Product Selection
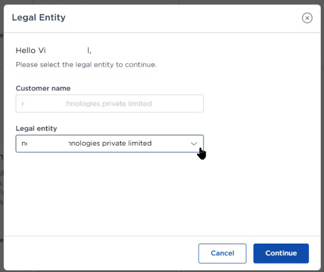
From the sidebar, open Orders to reach the Order Tracking screen, then click New Order (top-right). On the Product page, locate IZO™+ Multi Cloud Connect and click Buy. Select the Legal Entity the service will be contracted under (based on where cloud connectivity is required), then Continue.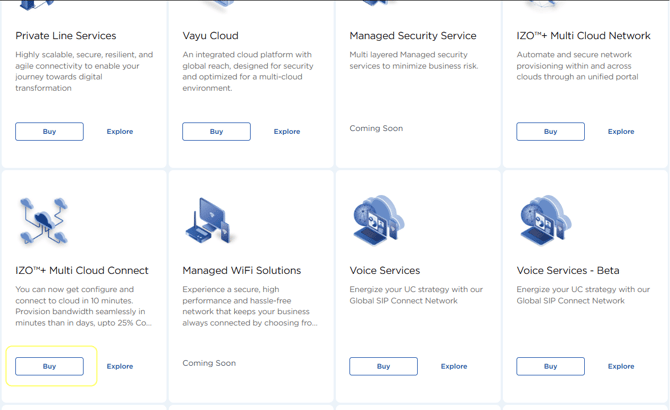
Step 2 – Cloud On-ramp Location
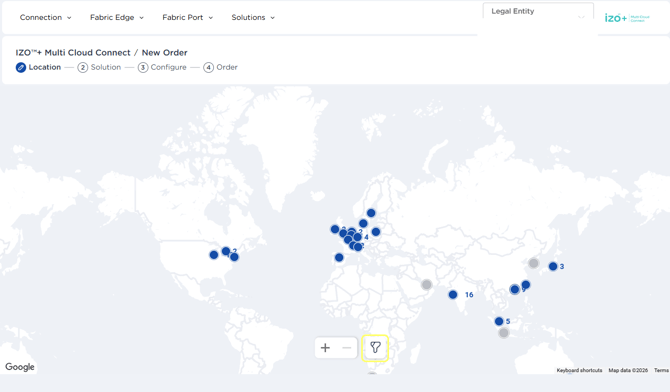
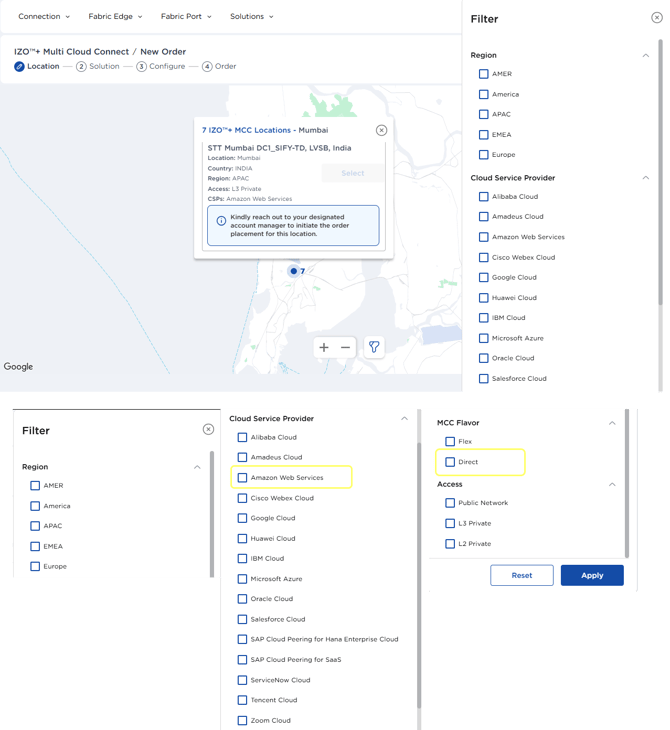
Click the Filter icon, set the Cloud Provider and MCC Flavor = Direct, and Apply. Select the location on the map, then choose the Data Center Location. This sets where the Virtual Cloud Connection terminates.
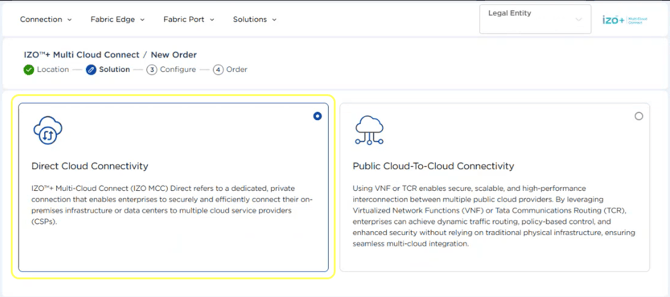
 Step 3 – Solution Design
Select
-
Direct Cloud Connectivity,
-
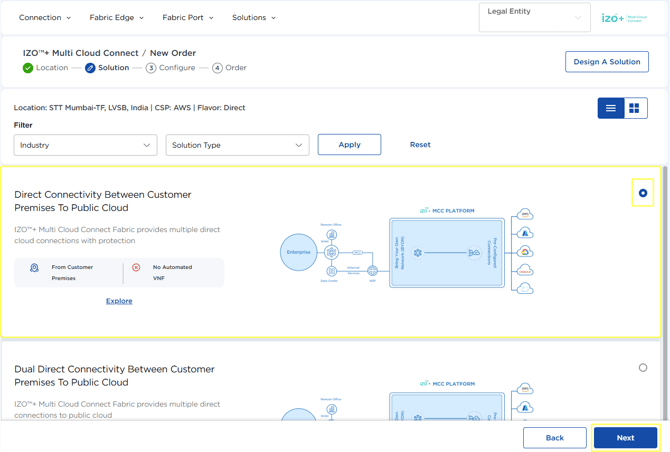
then the specific pattern
-
for a single direct link, Direct Connectivity Between Customer Premises to Public Cloud
-
for dual, the Dual Direct Connectivity Between Customer Premises to Public Cloud variant.
-
-
Click Next
-
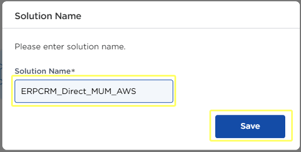
Enter a Solution Name.
Step 4 – Fabric Port Configuration
Double-click the Fabric Port icon and complete the fields, then Save and Validate.
|
Field |
Information |
What it is / Demo Value |
Mandatory |
|
MCC Flavor |
Fabric Port supports both MCC flavors: Direct – A direct link from Tata Communications PoP to the Cloud Service Provider (CSP). Flex – Adds a VNF between the PoP and CSP for advanced features like firewall or SD-WAN. |
Direct |
Yes |
|
Alias Name |
Alias Name acts as a unique identifier to link components, enabling easy reference throughout the solution. |
A unique reference used to link components |
Yes |
|
Port Type |
Choose the port type on the MCC Fabric:
|
Hosted (shared) or Dedicated (reserved) |
Yes |
|
Access Type |
Defines the type of access required on the selected MCC Fabric port:
|
Public, or Private (L3 / L2) |
Yes |
|
Location |
Select the location where you want the Fabric Port provisioned. This serves as the entry point into the IZO™+ MCC SDCI network. |
Where the Fabric Port is provisioned |
Yes |
|
Data Center |
Select the data center for your chosen location. This is where your Fabric Port will be set up. |
|
|
|
Is Usage Based ? |
Yes or No |
|
Yes |
|
Fixed Bandwidth |
Choose from Dropdown |
Only in case connection is usage based |
|
|
Burstable Bandwidth |
Choose from Dropdown |
Only in case connection is usage based |
|
|
Bandwidth |
Choose how much bandwidth you'd like to reserve for this Fabric Port. |
Reserved bandwidth for the port (Only in case connection is not usage based) |
Yes |
|
Fabric Port Topology |
|
Full Mesh / Hub & Spoke / Cloud-to-Cloud |
Yes |
|
Lag Type |
Select the lag type of this Fabric Port
|
LAG type for the port |
Yes |
|
Underlay GVPN Service ID |
Applicable in case of MCC Direct only as you are on Tata Communications network |
The underlay service the port rides on |
Yes |
|
Link Type |
Choose your Fabric Port setup:
|
Single or Dual (redundancy) |
Yes |
|
Redundancy Type |
|
Primary or Secondary (dual only) |
Yes |
|
PNR IP Required |
|
Whether PNR IP allocation is needed |
No |
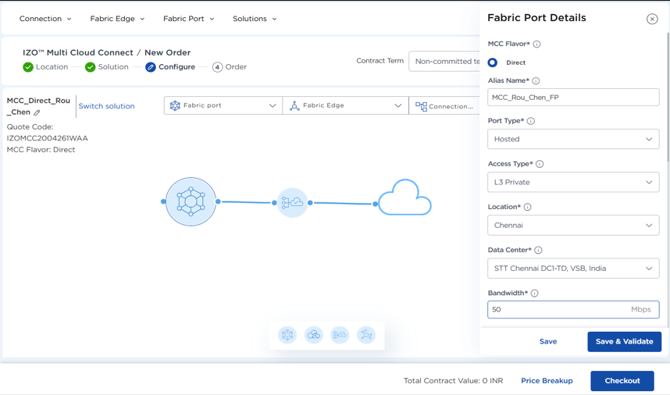
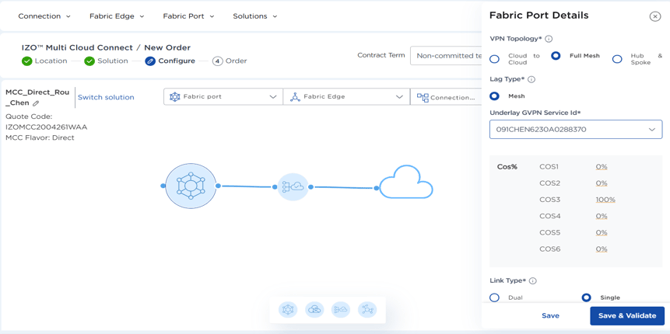
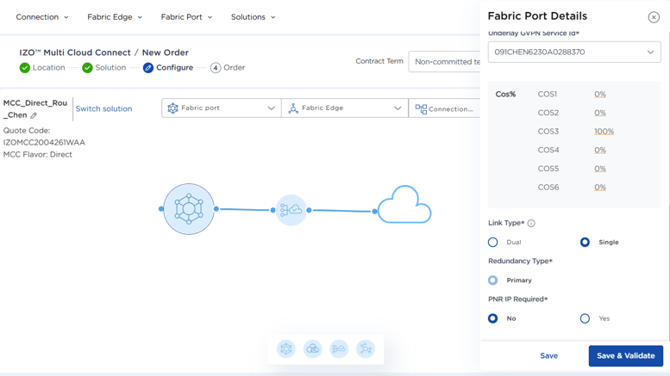
Once all the details are filled in all the required configuration details, click Save and Validate.
The system will validate the inputs:
-
If there are any issues, relevant error messages will be displayed.
-
If all details are correct, a confirmation pop‑up will appear stating “Component validation successful."
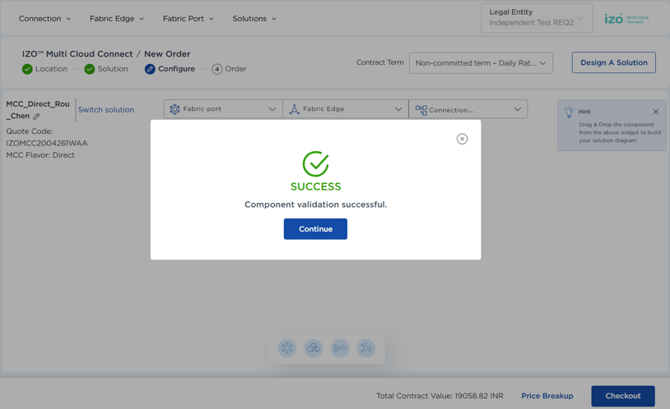
Step 5: Virtual Cloud Connection: choose your cloud
At the Virtual Cloud Connection step, select your target cloud service provider. The Virtual Cloud Connection fields, order completion and the cloud-side setup are specific to each provider and continue on that cloud's page as one flow – follow the page for your cloud:
- IZO™+ Multi Cloud Connect Direct – AWS: Virtual Cloud Connection, order & connection
- IZO™+ Multi Cloud Connect Direct – Azure: Virtual Cloud Connection, order & connection
- IZO™+ Multi Cloud Connect Direct – GCP: Virtual Cloud Connection, order & connection
Your cloud provider specific page carries the checkout and Get Network Config steps, so you complete the order there without returning to this page.
Related pages